Friday, March 23, 2007 | 9:28 AM
I’m becoming a bit frustrated about how Google treats my blog site.
To increase my chances of being indexed in Google search results, a few weeks ago, I added this blog site to Google Sitemaps. I followed the correct instructions, however, I feel like the crawl is taking so long.
However, for those of you who are still interested in having your blogspot on Sitemaps, here is the easiest route. One of the great benefits of using Sitemaps is that it allows the webmaster to directly notify Google about certain changes or additions to the site.
Login to your Google Sitemaps account using your Google account (if you have Gmail, then that should do). Once logged in, at the top of the Google Webmaster Tools window, there should be an option for you to add your site. Type in your site URL, for example, mine is http://geloton.blogspot.com, then click OK.

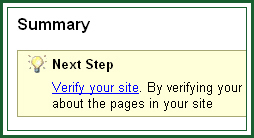
Before Google crawls your site for indexing, it needs to verify that you are really the owner of that web site. Click the Verify your site link.

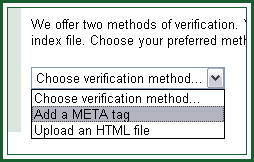
This will take you to the Verify site ownership window. Sitemaps will provide you with two options for site verification. You need to choose Add a META tag, and not the second option, Upload an HTML file, since Blogger doesn't allow that. The first options only requires you to add a piece of code to your template that Google will try to "find". Once it finds this code, your site will be verified.

Once you've selected this option, you will receive the code that you should include in your site.

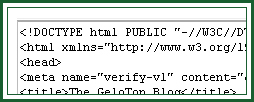
Copy this code. After which, go to your Blogger account, and go to Template. Paste the code between the HEAD tags. My ideal place is immediately below the beginning HEAD tag. It looks like this on your template:

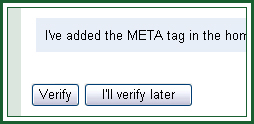
After pasting it, save your template, and go back to your Google Sitemaps account. Since you've already pasted the verification code, click the Verify button to let Google know that you own the web site.

You've already verified your site. There's some debate going on about whether you should stop at verification or proceed with uploading a sitemap to Google. To read this article, go HERE. If you wanna proceed with uploading a sitemap, then follow the next steps.
Uploading a sitemap allows you to provide Google additional information about your blog. Google will process your Sitemap and provide information on any errors and it will also download the sitemap everyday to index your blog fast.
On the Sitemaps tab, you will see a link to add a sitemap. Clicking this will take you to the Add Sitemap screen. Choose Add General Web Sitemap from the two options on the dropdown list.

You'll see that step 3 on the list allows you to input your sitemap URL. For this, just type in you blog URL, followed by atom.xml. Yes, this is the same as your ATOM feed. For example, mine is http://geloton.blogspot.com/atom.xml. If you are using the new Blogger, you must use http://yourblogname.blogspot.com/feeds/posts/full as the sitemap URL. Click the Add Web Sitemap button.
Now wait until you get the confirmation: You have added a Sitemap to http://yourblogname.blogspot.com/. Reports may take several hours to update. Thank you for your patience!
You're done! Now, all you have to do is to wait while Google does the job for you. I'm still waiting for mine though... :(
Labels: Blogging and the WWW


thanks for the guide..
Leave your response.